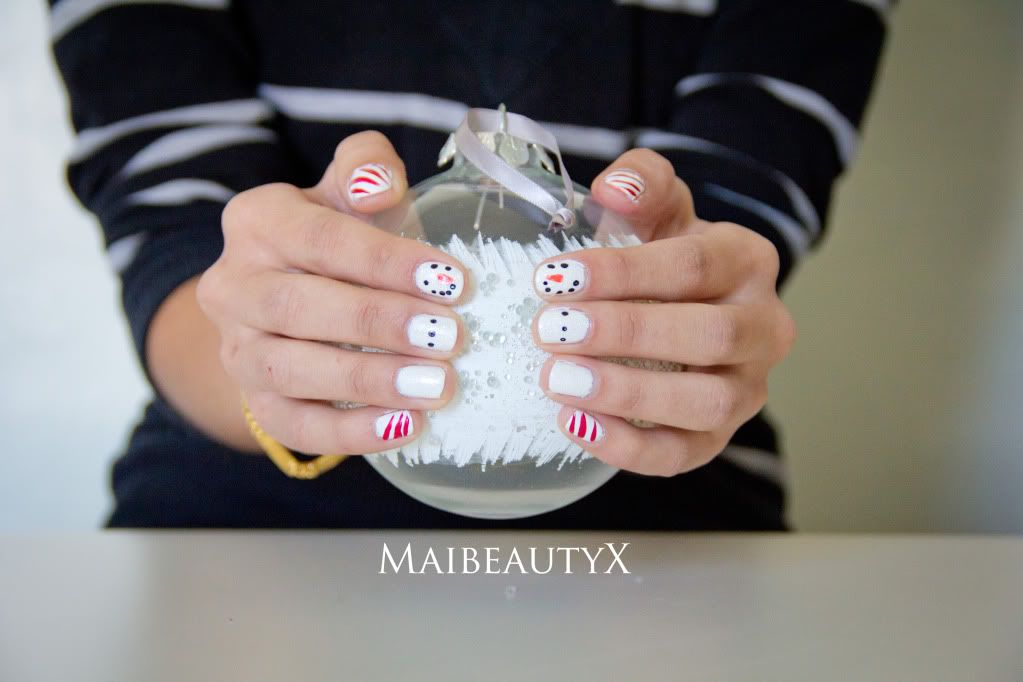
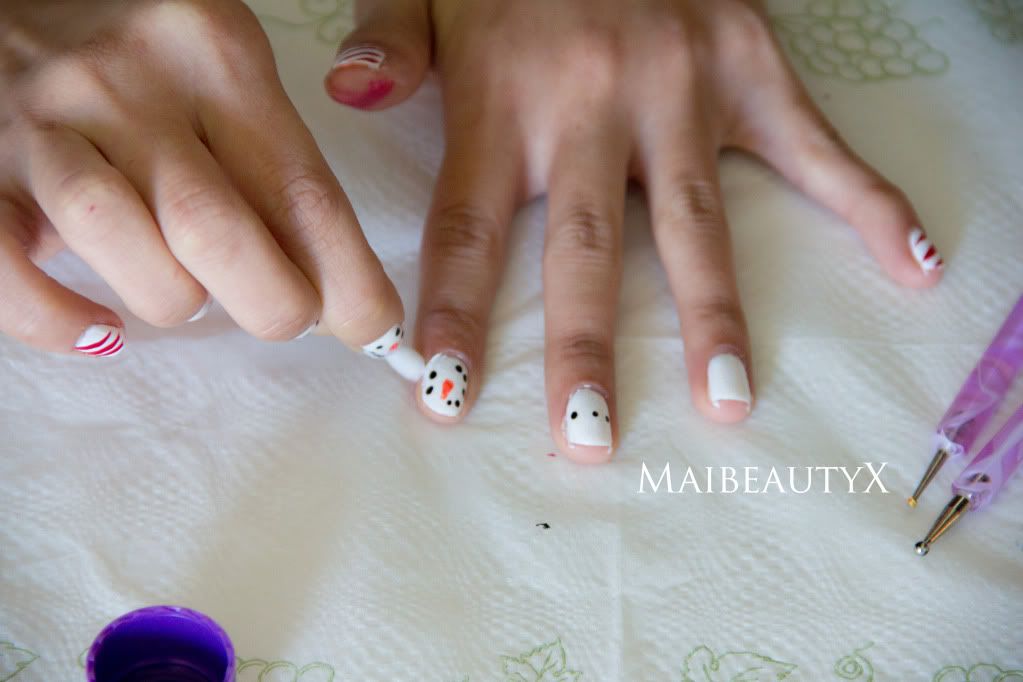
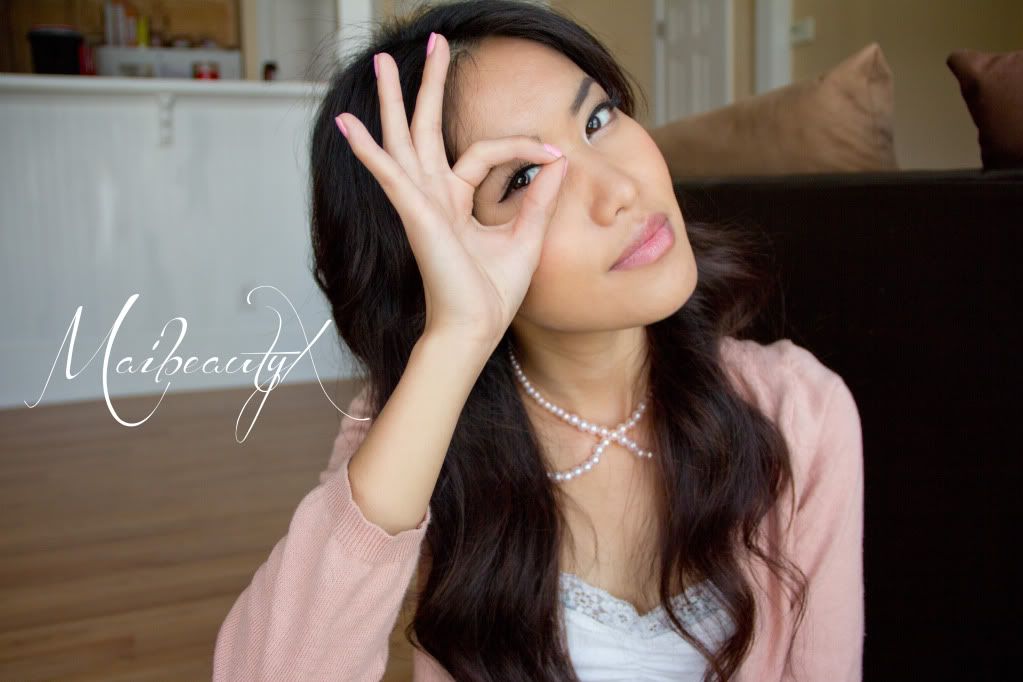
Hey guys! Christmas is getting closer and closer each and everyday. I love this season for its cold breeze outdoor, yet the warmth we share with family and friends; the colorful lights on trees and houses, yet the simplicity of candles burning; the aroma of cinnamon pine cones, yet the fresh scent of wood in the fireplace. The only thing that will complete this holiday season is the beautiful snow and its iridescent shine in the morning when the sun shines onto it.
I was inspired to find a way to temporarily make up for the lack of snow this holiday season and came up with this nail tutorial. I'm still hoping for a white Christmas, but this will do for now. I hope that you guys enjoy it! Happy Holidays & stay warm! = )
Here is a super quick and easy tutorial on how to achieve this beautiful bun in just a minute. I love how it looks like there was a lot of time and effort put into it, but in reality it is really easy.
I hope you guys enjoyed this video! A special thanks to my lovely guest, Chialyna. She will be featured in more of my videos now that my hair is too short to perform tutorials on it, but on a side note, I'll probably have a few tutorials for short hair too. I have to say I miss my long hair, but I also enjoy my short hair too so I'm not too sad over it. Lol. I hope you guys have a beautiful day!
Hey guys! I have been gone for quite a long time and I truly apologize for it. A lot of things have happened since my last video.
I went away in August to prepare for the next chapter of our lives. I was gone for a month and it sure was stressful, yet exciting. Then, in mid-September, we made a very big move across the states. Unfortunately, after the move, I became sick for a month which was an unpleasant & stressful, yet eye-opening experience. I realized I needed to take better care of myself no matter how busy life may become because good health is not something you find and make it your own, it requires effort and good care.
Being sick pushed back a lot of things which made unpacking and arranging our belongings take forever! Prior to the move I donated 3 large bags of clothes away, yet while unpacking I felt so overwhelmed by how much clothes I still have. Sigh.. The life of a fashion lover. Lol..
So.. That's a quick recap of what happened while I was away. I'm so glad to be back and excited to make new videos! I can't wait to show you guys!!! = )
When it comes to clothing reconstruction, the possibilities are limitless! I was playing around with a granny maxi skirt that I got from the thrift store to see what I could come up with. I was able to turn it into a halter hi-low dress with just a ribbon, pin, and belt. This look is very boho chic and pretty. My husband says he likes the skirt as a dress a whole lot more. I think I do too! ;)
I'm very guilty of buying clothes and not getting around to wear them. I know, it's a bad habit. Maybe that's why I've learned to cut back on shopping so much. Lol.. Anyways, this is part 1 of my Style Tip series. In this video, I'll show you guys how to turn a top into a dress just by adding a little bit of length.
Lately I've been quite obsessed with braids due to the extremely hot weather. I usually like to leave my hair down either straight or curled, but the weather has taken it's toll and I can no longer stand having my hair down.
I am a huge fan of The Hunger Games and I love the very simple dutch braid Jennifer Lawrence aka Katniss Everdeen wore in the movie. Since it was so hot the other day, I decided to create the famous side dutch braid, but added a twist to it.
This look is very easy, it took me less than 5 minutes to braid my hair and pin it up. It's great for any occasion and can be worn casually or with a few pretty hair pieces, it can turn into a beautiful updo. I hope you guys enjoyed this tutorial and stay tuned for my Katniss Everdeen inspired braid #2 tutorial coming shortly along with some special announcement that I think you guys will be very excited about! : )
My husband and I went walking at a strip mall/plaza last week and I picked up a few items. I wasn't planning to film a haul video, but I got some requests to make one, so here it is!
I think the reason why I feel like I don't shop a lot anymore is probably because whenever I shop, I find really good deals so it doesn't feel like I am using a lot of money on clothes, etc. which makes me feel like I don't shop anymore. Does that even make sense? Lol.. Have a great day! = )
The shape of our eyebrows can make us appear more youthful or age us by years so it is important to have a nice set of eyebrows to frame our face. Thicker brows call for a more youthful appearance, while thin and highly arched brows call for a matured look. I'm not a fan of thin brows because it makes the face appear stiff and dramatic, which isn't a very pretty look. Highly arched brows creates the illusion of a facelift that can really age a young person. We're only young for a few years so I am in no rush to get old or look old. ; )
There are three types: natural, fill in, and drawn in. Natural is as natural as it gets, with no products or anything to enhance the brows. Maybe just a little plucking for shape, but that's about it. Filling in the brows consists of very light strokes to the sparse areas, to achieve a fuller look, while keeping it more on the natural side. Drawn in brows as the name says is actually drawing it in because the brows would be invisible without it. I would advise against the last one because it a lot of time, it results in looking very fake.
I have very sparse and thin eyebrows so I do like to make my brows a lot thicker than it's natural shape. Here is my tutorial on how I achieve my brows. It actually doesn't take a lot of time. If you're a beginner then it will take a little longer, but it will get easier with more practice. Btw, I am using Mac's brow pencil in Spiked.
Rule of thumb for choosing the correct color:
-If your hair is really dark/pitch black, you'll want to stick to black or a really dark brown. Black hair with brown eyebrows just doesn't look good together.
-If you have dark brown hair or lighter, you'll want a color that is 1-2 shades lighter, but no more than that. You don't want your eyebrows to be that much lighter than your hair. You want them to be as similar as possible to achieve natural looking eyebrows.
-If you have blonde hair, you'll want a color that is 1-2 shades darker so that your eyebrows won't be washed out.
I am so happy that the weather is getting warmer. Spring and Fall are my two favorite seasons, neither too hot nor cold, just perfect! This Spring I am pulling out my boyfriend jeans for when the weather is not too hot for shorts, but not too cold either.
I've put together 4 outfits to show how versatile boyfriend jeans can be.
The first pairing is very casual. The plain white button up is very basic and the vest is a neutral color which tones down the look. The white button up can make the whole outfit look very baggy, which is where the vest comes in. It gives the body an hourglass shape, allowing the white button up to be loose fitted, yet still look nice.
The second pairing is girly casual. The bright coral button up is a great pop of color. It adds liveliness to the outfit and takes the boyfriend jeans away from the really boy-ish look, making it more girly.
The third pairing is dressier than the other two. The black vest along with the black point heels are dressy pieces. Because the jeans are so casual, these two combination gives off a chic and edgy look. This is one of my favorite looks out of the three. I love the edge and rock feel when put together.
Well, I hope you guys enjoyed my pairings! If you don't want to dress up and want to keep everything very simple, just pair your boyfriend jeans with a tee and tennis shoes and you're all set to go. Have an awesome week!
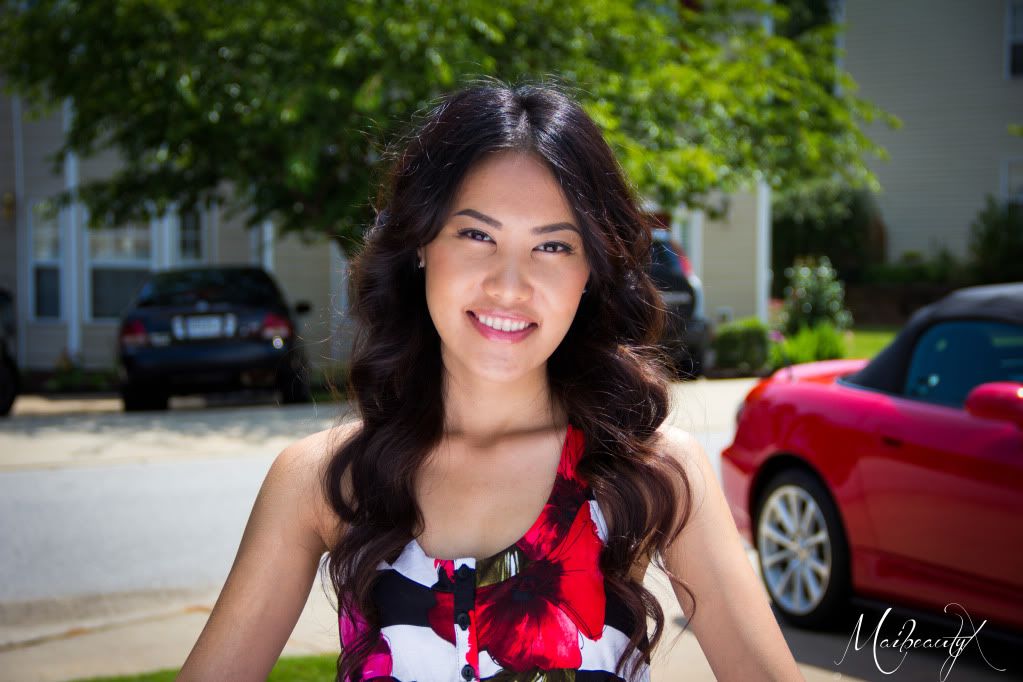
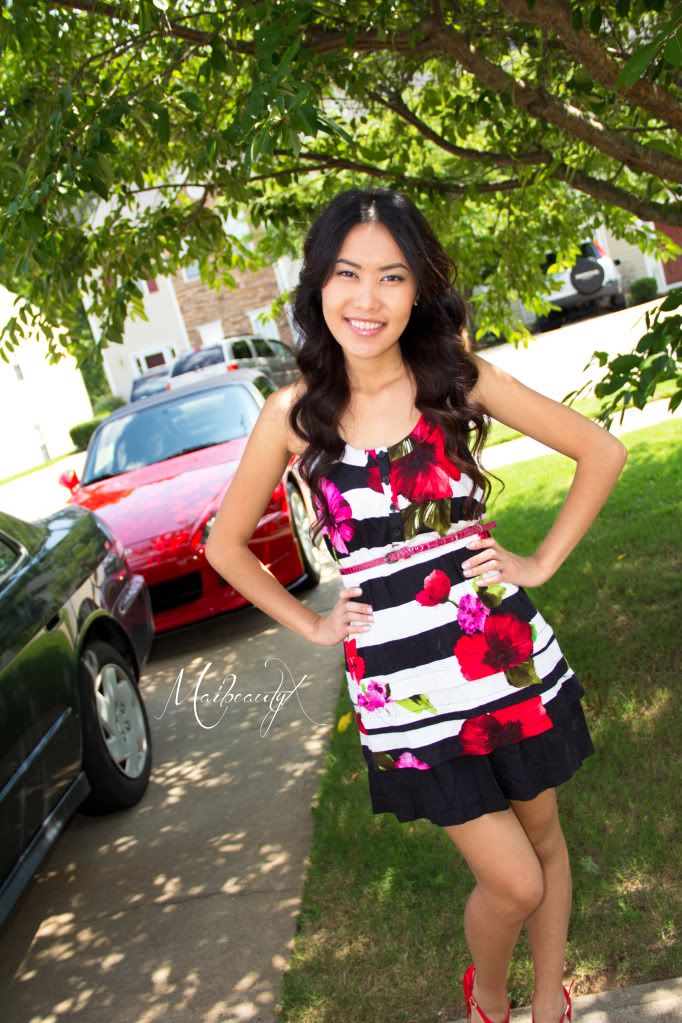
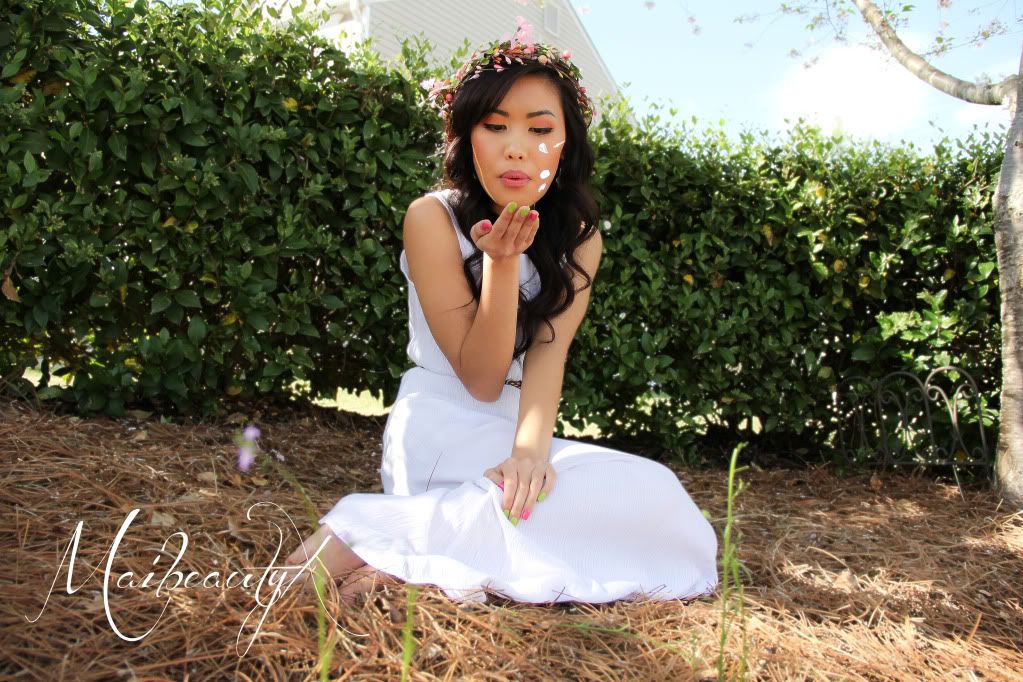
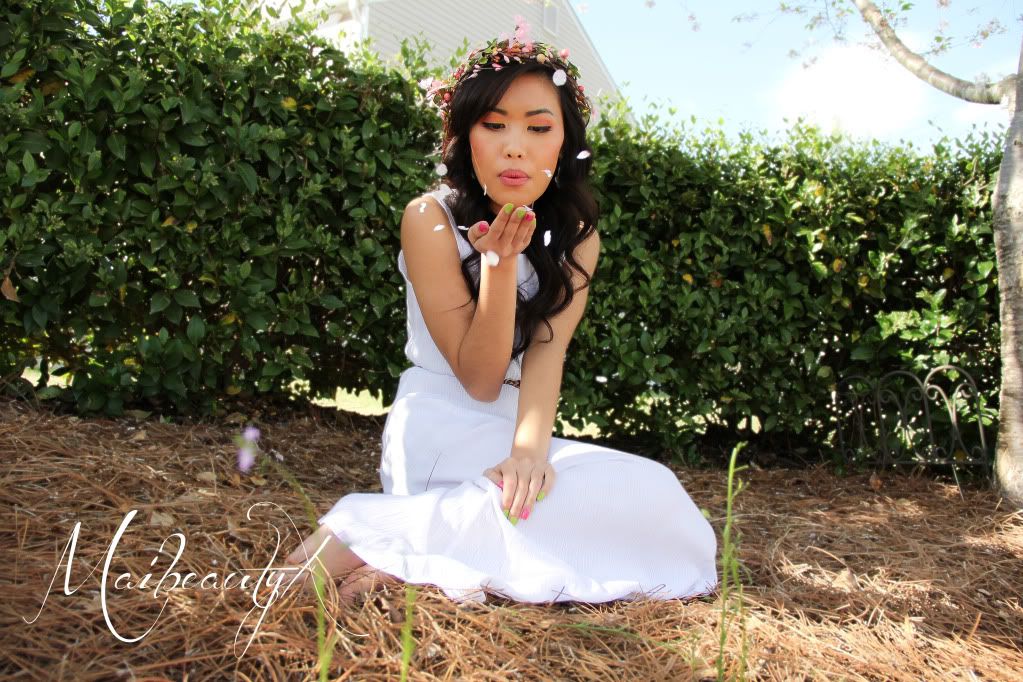
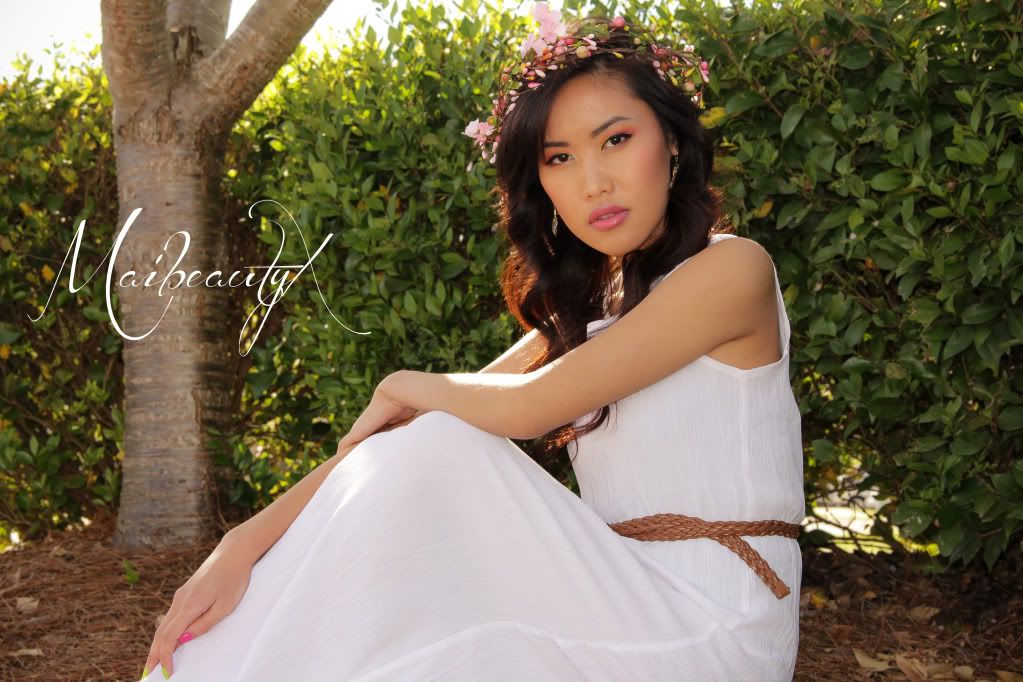
The first thing that came to mind when I thought of spring was Stevie B's song, "Spring Love." Super old school music! Brings back a lot of memory. I was probably only 10 when I first heard it. Haha.. Anyways, I decided to call this photo session Spring Love after the song. I hope you guys enjoy my pictures and please don't use them without my granted permission. Thank you!
Color blocking is such a pretty trend as the warmer weather rolls in. It is so colorful, giving off such a cheerful feeling. I've seen a lot of color block outfits and shoes, so I decided why not color block nails? I think this is a great way to combine colors in a way that isn't too out there. I hope you guys enjoy my tutorial. You can switch the colors around if you'd like. There is really no wrong way of color blocking. Have fun!
For such a long time I have been trying to find a good moisturizer that will help with my combination/oily/acne prone skin and I have to say, I think I have finally found it! For the past month, I have been using the Mac Mineralize Charged Water Moisture Gel and it has been helping my skin combat oil and dryness which a lot of other moisturizers I have used before has yet to do so. Here is my review of the Mac Mineralize Charged Water Moisture Gel.
Pros:
This moisturizer has helped me tremendously in combating oil. During the mornings, my skin is usually more dry, then towards the end of the day, my face becomes really oily, especially in the t-zone so I would normally have to blot a few times a day, but since using this product, I only have to blot 1-2 times a day. A lot of this has to do with the fact that this moisturizer is a gel consistency so it is really lightweight therefore, it doesn't leave the skin feeling greasy at all like traditional moisturizers.
Cons:
Before purchasing this product, one of the problems I had was the packaging. Because it comes in a tub rather than a container with a pump, I was a little hesitant due to sanitary reasons. Having to use a spatula or your finger to get the product out can lead to bacteria getting in, but I am glad it didn't hold me back from purchasing because putting the packaging aside, this is a really good product. Another thing about this moisturizer that I forgot to mention is that it does not contain any SPF so if you're going to be outside for a long amount of time, I would recommend wearing sunscreen over the moisturizer or maybe perhaps going with another moisturizer that contains SPF. Lastly, this moisturizer is one the most expensive moisturizers I have ever bought, retailing at $37.00. That is a lot of money, but for the amount of product that it comes with and for the results it performs, it was well worth my money and I would definitely be repurchasing whenever I run out, which will be a few months from now.
Hello!! I know I have been MIA for the past few weeks, but I am making my way back. I've just been so busy! Anyways, I've just recently had a small photo session with my husband as my photographer so I wanted to share a short slideshow of the end results. I hope you guys enjoy it!
Spring is just around the corner and I loved the high-low skirt I wore in my photos. I absolutely adore how the skirt was flowing in the air so effortlessly. This is a perfect piece for the warm weather and I cannot wait to pair it with more outfits. If you guys are interested in seeing a pairing video with high-low skirts, then leave me a comment down below and I will be more than happy to make it for you guys!
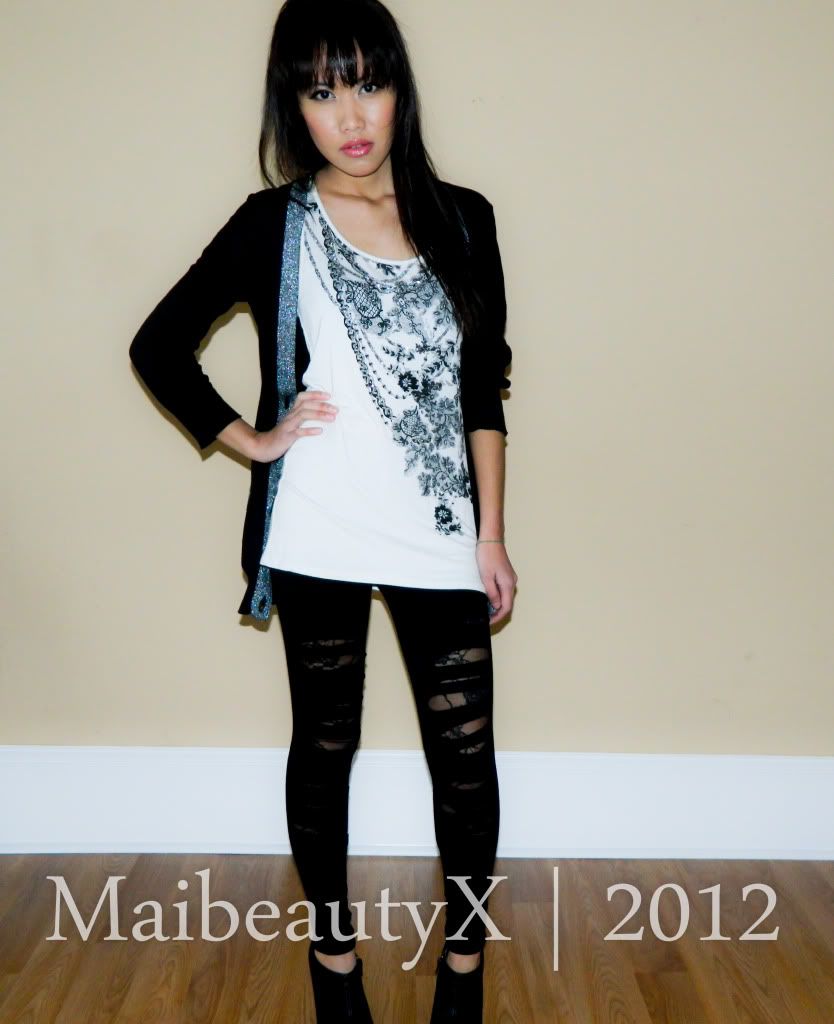
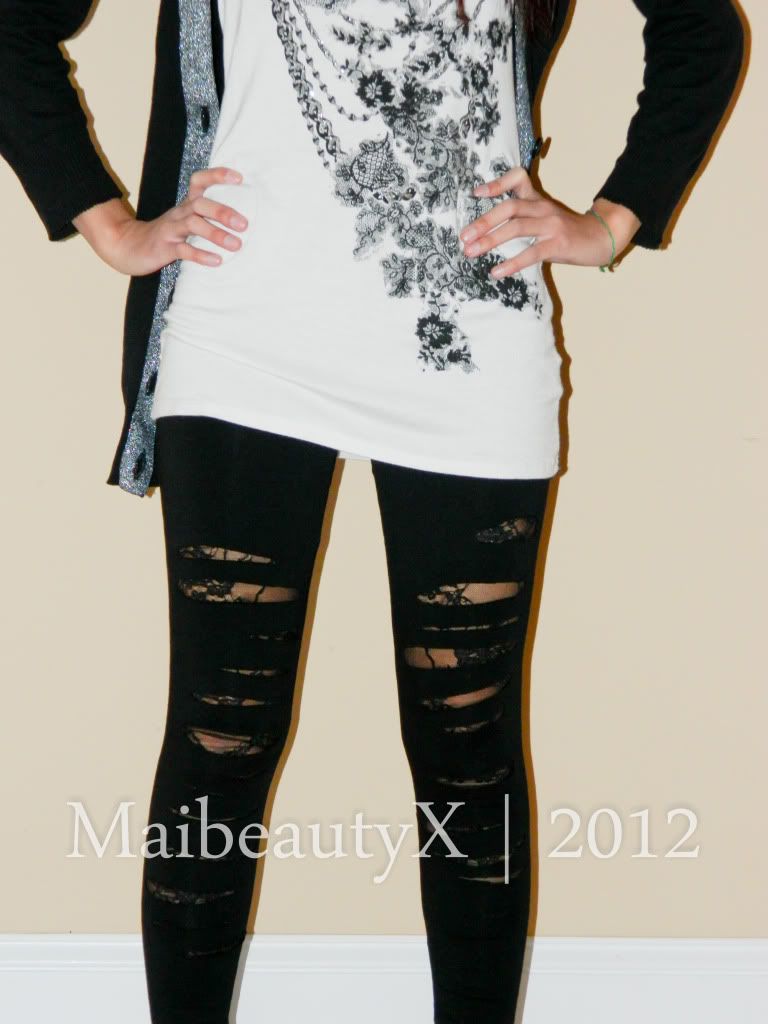
Leggings are one of my most favorite clothing items! I think every girl must have a pair of black leggings as part of their closet essentials. They're so comfortable, easy to dress up or down, and I doubt they'll ever go out of style!
I've come to realize that every time I wear a pair of leggings, it's always been solid black. I was determined to come up with a new look for your everyday leggings that can be incorporated into different outfits, adding life and texture.
I've seen numerous ripped leggings when paired correctly may be flattering, while other times often come off a bit trashy. Because the lace is under the rips, there is no bare skin showing which takes the look to a whole different level. The combination of solid and lace textures bring an edge to your everyday leggings.
I hope you've enjoyed my tutorial. Have a great day! ;)
Hi everyone! I have been very busy the last two months. I went out of town for a good 1 1/2 month to visit my family and it was a lot of fun, but I am excited to be back. My start to 2012 has been great and I am looking forward to what's to come this year. I can already tell it's going to be good!
For this new year, I've decided that I will be doing quick tip videos where I share with you things that I find helpful whether it be skincare, makeup, fashion, etc. The first quick tip video is on skin hydration. Having been away for almost 2 months in different climate and weather, my skin has reacted crazy once I returned home. I had extremely dry and flaky skin which caused breakouts so I was looking for ways to hydrate my skin and bring it back to its normal state. A very quick and easy remedy that I found was Pond's cold cream which is inexpensive and works amazingly. I hope you guys find this tip helpful!
To start off the new year, I am planning a giveaway that consists of some of my very own favorite products. Once I have all the things together, I will post up a video and the rules. Remember to check back for updates on it! I'll see you all again very soon! ;)